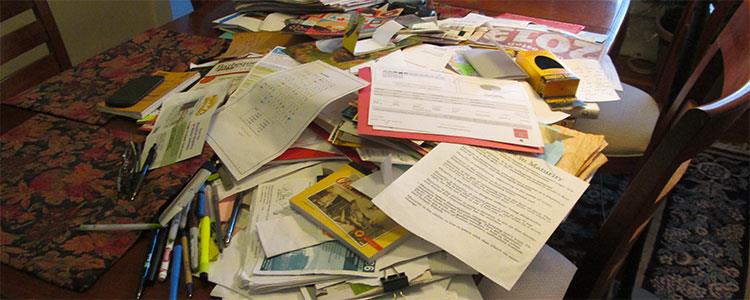
Taming the Paper Monster: Tips for Organzing Your Files

Our mailboxes overflow with advertisements, coupons, and bills, and we dutifully bring reams of material from the office to review before bed. Our children proudly present us with scribbles and drawings we can’t bear to toss.
Welcome to the world of The Paper Monster! (Do you even remember what the top of your desk looks like?)
Even in today’s predominantly electronic world, paper clutter persists. During chaotic or stressful times, it can feel like the Paper Monster is poised to take over every available surface, along with a good chunk of our sanity.
In addition to the stress it creates, the Paper Monster costs us valuable time and money by decreasing our productivity. Since stacks of unsorted papers add strain and discord to your life, you’ve got to come up with a systematic plan to eliminate your Paper Monster before it takes up any more of your time and energy.
Here are some quick and easy tips to help you tackle the papers taking over your space.
Files And Documents
For important files and documents, try the ABC Filing System. It’s as simple as. . . Well, you know. Separate your pile of papers according to three categories:
Action: In this file, place documents that require action or immediate attention: forms to sign, bills to pay, invitations that need a RSVP. Keep this file nearby and handy, and either carve out time to clean it out each evening or take short 5-10 minute chunks of time throughout the day to make sure it doesn’t become overstuffed.
Basic: Here’s where you keep basic forms and documents like health insurance records, pay stubs, and paid bills. Credit card statements, important receipts, and tax documents fit here, as well. Keep these documents for one year, and then move them to. . .
Classic: These are documents you need to keep long-term. Birth certificates, immunization records, tax returns, medical records, and legal documents all belong here. Credit reports, insurance documents, and mortgage statements can also be kept in this file.
This simple system will help you stay on top of the growing paper pile that’s likely taking over your kitchen counter.
Children’s Artwork
It’s one of the biggest dilemmas parents face: which of the indecipherable scribbles and scratches do you keep, for how long, and where does it go when a new one replaces it? Keep the fridge clear of clutter with these ideas:
Corkboard Gallery Wall: Designate a wall in the playroom or children’s room where they can display their pictures and coloring pages. Replace the glass in thrift store picture frames with corkboard, paint the frames fun colors, and hang them on the wall. Your child can hang up the pieces she’s most proud of in each frame. As an alternative, leave off the corkboard and use masking or painter’s tape to stick the drawings up inside the frames.
Wire Hanging Gallery: Use a mounted curtain wire with clips to hold your children’s artwork, similar to a clothesline. Your child can easily add and change drawings, and it’s an easy, affordable solution!
Keep it Forever: Of course, there’s an app for that! Use an app like ArtKive to snap pictures of your child’s artwork and keep it in your account for years to come. You may sort them by age and date, and you may even print a more manageable sized book of all pieces in your gallery.
Receipts
Receipts are arguably the most challenging papers to keep neat and organized, and because most organizations recommend keeping six years of receipts, they can easily take up too much space. The best solution for keeping important receipts for business expenses or tax time is to scan them digitally.
Here are a few things you can do to make that process even easier:
Write details on the receipt: Especially for business receipts, make a note directly on the page detailing what the purchase was, who was there (for dinners, etc.), the amount, and when the purchase was made. Receipts become faded and wrinkled over time, and having this information may save the day during an audit.
If you can’t scan, photograph: Even if you don’t own a scanner, snap a photo of the receipt with your phone and keep a separate folder for these pictures. If a receipt does become lost, you can rely on the photo to serve as proof of purchase.
Keep a binder: If you’re dead set against digital storage, keep a binder nearby for your receipts. Tape each one to a sheet of paper, write the purpose, amount, and date on the sheet, and place it in your binder. Use tabs to separate sections by date, client, or project as appropriate.
It’s easy to let small pieces of important, but messy, paper pile up. Using these tips regularly will help you keep control of your space, and you’ll save time, stress, and money by implementing good organization habits.
When it’s time to purge those papers (and other unused or unwanted items), The Junkluggers is just a phone call away. We’ll happily gather your boxes of papers and recycle them. Find a location near you and schedule a pickup today.
